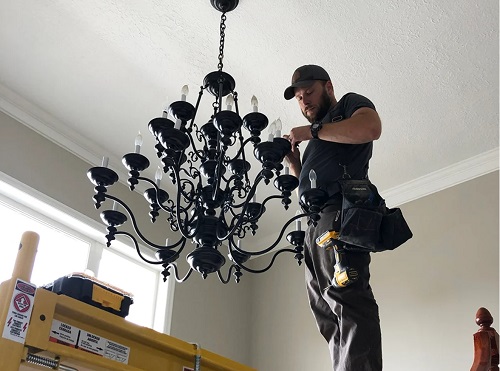
Changing a chandelier can dramatically transform the look of any room. However, knowing how to change a chandelier safely and correctly is essential to avoid any complications. In this guide, we’ll walk you through the step-by-step process, ensuring you have all the necessary tools and knowledge to get the job done. From safely removing the old fixture to installing the new one, you’ll learn how to change a chandelier without hassle. Whether you’re doing this for the first time or need a refresher, this guide will provide you with clear instructions to follow.

What Tools Do You Need to Change a Chandelier?
Before you begin, gathering all the necessary tools is crucial. Having the right equipment will make the process smoother and safer. The basic tools you will need include a screwdriver, pliers, wire cutters, a voltage tester, and a sturdy ladder. Additionally, depending on your specific chandelier, you may need a wrench or adjustable spanner to loosen bolts. Always ensure that you have a helper if the chandelier is particularly heavy or if you’re working at a height. With the correct tools at hand, you’re ready to start the process of changing your chandelier.
How Do You Safely Remove the Old Chandelier?
Turning Off Power to the Chandelier
Safety should be your top priority when changing a chandelier. Start by turning off the power at the circuit breaker to ensure there is no risk of electric shock. Once the power is off, use a voltage tester to ensure the wires are not live. This step is crucial and should never be skipped. After confirming that the power is off, you can safely proceed with removing the old chandelier.

Detaching the Old Chandelier
Begin by carefully unscrewing the mounting plate that secures the chandelier to the ceiling. This may require a screwdriver or wrench, depending on the fixture. As you detach the chandelier, be sure to support its weight to prevent it from falling. If the chandelier is heavy, it’s best to have someone help you. Slowly lower the chandelier and place it on a flat surface where it won’t be damaged.
Handling Wiring with Care
With the chandelier detached, the next step is to disconnect the wiring. Carefully untwist the wire connectors, ensuring you remember which wires connect to each other. It’s helpful to take a photo or label the wires for guidance when installing the new chandelier. Gently separate the wires, ensuring they don’t touch, as this could create a short circuit later. Once the wires are safely separated, you can remove the old chandelier entirely.
How to Install the New Chandelier Properly?
Preparing the New Chandelier for Installation
Before installing the new chandelier, it’s important to prepare it properly. Unpack the chandelier and check all parts are included and undamaged. Assemble any necessary components according to the manufacturer’s instructions. Ensure that the mounting bracket is suitable for your ceiling and that the chandelier’s weight is supported by the ceiling’s electrical box. If the new chandelier is significantly heavier than the old one, you may need to install a reinforced electrical box.
Connecting the Wires Correctly
Connecting the wires is one of the most critical steps. Begin by attaching the chandelier’s wires to the corresponding wires in the ceiling. Usually, this involves connecting the black (hot) wire to the black wire, the white (neutral) wire to the white wire, and the ground wire (often green or bare copper) to the ground wire in the ceiling. Use wire nuts to secure the connections and wrap them with electrical tape for extra safety. Make sure the wires are firmly connected and not exposed.
Securing and Testing the New Chandelier
Once the wires are connected, attach the chandelier to the ceiling bracket. Carefully raise the chandelier and secure it with the screws or bolts provided. Ensure that it is firmly attached and does not wobble. After securing the chandelier, restore power at the circuit breaker and test the chandelier to ensure it works correctly. If everything is functioning as expected, you’ve successfully installed your new chandelier.
Common Mistakes to Avoid When Changing a Chandelier
Changing a chandelier may seem straightforward, but there are common mistakes you should avoid. One mistake is failing to turn off the power completely, which can lead to dangerous electric shocks. Another is not supporting the chandelier’s weight properly during removal, which can cause damage or injury. Additionally, improper wiring connections can lead to malfunctioning or even electrical fires. Always follow the manufacturer’s instructions and double-check all steps to ensure a safe and successful installation.
Conclusion
Changing a chandelier can be a rewarding DIY project that enhances your home’s aesthetic. By following the steps outlined in this guide, you’ll know how to change a chandelier safely and effectively. From gathering the right tools to ensuring proper installation, each step is crucial for a successful outcome. Remember, if you ever feel uncertain, it’s always best to consult with a professional to avoid any mishaps. With the right preparation and care, you can enjoy your new chandelier for years to come.
FAQ
1.Can I change a chandelier by myself or should I hire a professional?
While it’s possible to change a chandelier yourself, hiring a professional is advisable if you’re not comfortable working with electricity or handling heavy fixtures.
2.What should I do if the chandelier is too heavy to handle alone?
If the chandelier is too heavy, enlist the help of a friend or professional to assist with the removal and installation process.
3.How do I choose the right replacement chandelier for my room?
Consider the size of your room, ceiling height, and the overall design theme when selecting a new chandelier. It should complement your space without overwhelming it.
