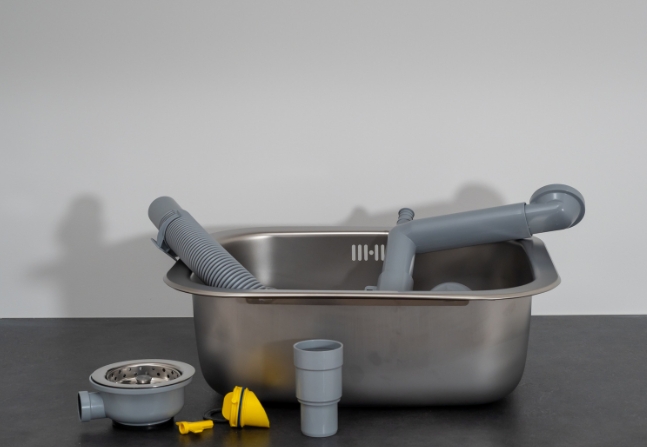
Installing a kitchen sink can seem like a daunting task, but with the right preparation and tools, it’s a manageable DIY project. This comprehensive guide will walk you through every step of the installation process, from selecting the right sink to ensuring a leak-free setup. Whether you’re replacing an old sink or installing a new one, this guide will help you achieve a professional-looking result.
What Types of Kitchen Sinks Are Available?
When choosing a new kitchen sink, it’s important to consider the various styles and their installation requirements. Here are the most common types:
Understanding the different types will help you choose the best sink for your needs and plan the installation accordingly.
What Tools and Materials Do You Need for Installation?
Before starting your installation, gather the following tools and materials:
Tools:
○ Adjustable wrench
○ Screwdrivers (flathead and Phillips)
○ Plumber’s putty or silicone sealant
○ Utility knife
○ Measuring tape
○ Pipe wrenches
Materials:
○ New sink
○ Sink mounting clips (for drop-in sinks)
○ Sink drain assembly
○ Plumber’s tape
○ New faucet (if replacing)
Having these items ready will make the installation process smoother and more efficient.

How to Prepare for Installing a Kitchen Sink
Proper preparation is crucial for a successful kitchen sink installation. This stage involves ensuring that your countertop and cabinet are ready to accommodate the new sink, whether you’re replacing an old one or installing a new type. Preparation includes measuring and cutting the countertop accurately, removing the old sink and faucet, and reinforcing the cabinet structure if necessary. By taking these steps, you can avoid common pitfalls and ensure a smooth installation process, leading to a secure and professional result.
How to Measure and Cut Your Countertop
1.Measure the Sink: Begin by measuring the dimensions of your new sink. This will help you determine the correct size of the opening in your countertop.
2.Mark the Cutout: Place the sink on the countertop and trace around it to outline the cutout area. Ensure the sink fits within the cabinet’s dimensions.
3.Cut the Countertop: Use a jigsaw or reciprocating saw to cut along the marked lines. Smooth the edges with a file or sandpaper to prevent damage to the sink.
How to Remove the Old Sink and Faucet
1.Turn Off Water Supply: Locate the water shut-off valves under the sink and turn them off. Open the faucet to drain any remaining water.
2.Disconnect Plumbing: Use pipe wrenches to disconnect the drain pipes and the supply lines from the old faucet.
3.Remove Old Sink: If it’s a drop-in sink, remove the mounting clips or screws. For undermount sinks, you may need to cut through any adhesive or caulk.
How to Ensure Proper Cabinet Support
1.Check Cabinet Structure: Ensure that your cabinet is sturdy enough to support the new sink. Reinforce the cabinet if needed.
2.Install Support Brackets: If you’re installing a heavy sink, consider adding support brackets or reinforcing the cabinet with plywood.
How to Install Your New Kitchen Sink
Once your preparation is complete, it’s time to focus on the actual installation of your new kitchen sink. This stage involves positioning the sink, securing it firmly, and ensuring all connections are properly made. Whether you’re installing a drop-in, undermount, or farmhouse sink, each type has its specific installation steps. By following the correct procedures for your sink style, you can ensure a secure fit and a leak-free setup. This section will guide you through each step of the installation process to achieve a flawless finish.
How to Install a Drop-In Sink
1.Apply Sealant: Spread a bead of plumber’s putty or silicone sealant around the edge of the sink opening.
2.Position the Sink: Place the sink into the opening and press down firmly. Ensure it sits evenly.
3.Secure the Sink: Attach the mounting clips from underneath the countertop to secure the sink in place.
How to Install an Undermount Sink
1.Apply Adhesive: Spread a bead of silicone adhesive around the edge of the sink cutout.
2.Position the Sink: Lift the sink into place under the countertop and press it against the adhesive. Ensure it is level.
3.Attach the Sink: Use mounting brackets or clips to secure the sink to the underside of the countertop.
How to Install a Farmhouse Sink
1.Fit the Sink: Position the farmhouse sink in the cabinet and ensure it fits snugly.
2.Secure the Sink: Attach any provided mounting brackets or clips to hold the sink in place.
3.Adjust Cabinet: You may need to adjust the cabinet or modify it to fit the sink properly.
How to Seal and Test Your Kitchen Sink Installation
1.Apply Sealant: Once the sink is in place, apply a bead of silicone sealant around the edge to prevent leaks.
2.Reconnect Plumbing: Reattach the drain pipes and supply lines to the new sink and faucet.
3.Test for Leaks: Turn the water supply back on and check for any leaks around the sink and plumbing connections.
Conclusion
Installing a kitchen sink is a rewarding project that enhances your kitchen’s functionality and aesthetics. By following these steps, from selecting the right sink to ensuring a proper seal, you can achieve a professional finish. Regular maintenance will keep your sink in top condition for years to come.
FAQs
How long does it take to install a kitchen sink?
Typically, installing a kitchen sink can take 2 to 4 hours, depending on the complexity of the installation and whether you’re replacing an old sink or starting from scratch.
Can I install a kitchen sink myself or should I hire a professional?
Installing a kitchen sink yourself is feasible with basic DIY skills and the right tools. However, if you’re unsure or uncomfortable with plumbing, hiring a professional may be the best option.
What maintenance is required for a newly installed kitchen sink?
After installation, regularly check for leaks and clean the sink with non-abrasive cleaners. Apply a fresh bead of silicone sealant as needed to maintain a watertight seal.
