Installing a new toilet on your own can seem like a daunting task, but with the right guidance, it’s entirely manageable. This step-by-step guide will walk you through the entire process of how to install a new toilet without a plumber, saving you both time and money. Whether you’re tackling this project as part of a bathroom renovation or simply replacing an old or malfunctioning toilet, understanding the correct procedure is key.By following these instructions carefully, you can achieve a successful installation that will serve you well for years to come.. Let’s dive into the tools you’ll need and the steps involved in the process.

What Tools and Materials Do You Need for Toilet Installation?
Before you begin, it’s crucial to gather all the tools and materials you’ll need to install a new toilet. This preparation ensures the process runs smoothly and without unnecessary interruptions. You’ll need a few basic tools such as an adjustable wrench, pliers, a screwdriver, and a putty knife. Additionally, make sure you have a new wax ring, toilet bolts, a sponge or towels, and silicone caulk on hand. The new toilet itself, including the bowl and tank, should be ready for installation. Having everything prepared and within reach will help you complete the installation efficiently.
How to Remove the Old Toilet
Step 1: Shut Off the Water Supply
Begin by shutting off the toilet’s water supply, which is the most crucial step in the removal process. Find the shut-off valve, typically located behind the toilet near the floor, and turn it clockwise to halt the water flow. Once the valve is closed, flush the toilet to empty as much water as you can from the tank and bowl. This is an important step to prevent any water spills or damage during the removal. If water is still flowing, check the valve again to ensure it is fully closed.

Step 2: Drain the Toilet and Disconnect the Water Line
After turning off the water, the next step is to drain any remaining water from the toilet. Use a sponge or towels to absorb the water from both the tank and the bowl. Then, use an adjustable wrench to detach the water supply line from the toilet tank. It’s wise to have a bucket or towels underneath to catch any leftover water that might drip out. Completing this step will help maintain a clean workspace and prevent water damage during the toilet removal.
Step 3: Take Out the Old Toilet
Now that the water has been drained and the supply line is disconnected, you can proceed to remove the old toilet. Begin by taking off the caps that cover the bolts at the toilet’s base. Use a wrench to unscrew the nuts from these bolts. After the bolts are removed, gently rock the toilet back and forth to loosen the wax ring seal. Carefully lift the toilet and place it aside. If the toilet is heavy, consider getting assistance to avoid injury. Once the toilet is removed, use a putty knife to remove any leftover wax from the flange, preparing it for the new installation.
How to Install the New Toilet: Step-by-Step
Step 1: Prepare the Flange and Wax Ring
Before installing the new toilet, ensure that the flange is clean and in good condition. The flange is the ring that connects the toilet to the floor and the drainpipe, so it must be secure. Place the new wax ring onto the flange. This ring forms a watertight seal between the toilet and the drain, preventing leaks. Ensure that the wax ring is centered on the flange for a proper seal. Some wax rings come with a plastic horn for added sealing; make sure it’s facing the drainpipe if applicable.
Step 2: Position and Secure the Toilet
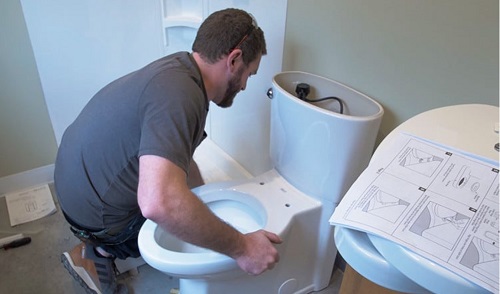
With the wax ring in place, carefully lower the new toilet bowl onto the flange, aligning the bolt holes on the toilet with the bolts in the floor. Press down firmly but gently to compress the wax ring and create a seal. Secure the toilet to the floor by tightening the nuts onto the bolts. Be sure to tighten them evenly to avoid putting uneven pressure on the toilet, which can cause cracks. Once the toilet is secure, check to make sure it’s level. If necessary, use toilet shims to level the toilet before fully tightening the bolts.
Step 3: Attach the Tank and Connect the Water Supply
If your toilet comes in two parts, the next step is to attach the tank to the bowl. Position the tank on the bowl, aligning the bolt holes. Insert the bolts through the holes and tighten them evenly using a wrench, making sure not to overtighten as this can crack the porcelain. After securing the tank, reattach the water supply line to the tank. Restore the water supply by rotating the shut-off valve should be turned counterclockwise. Allow the tank to fill with water, then flush the toilet to check for any leaks. Tighten any connections if necessary.
What Common Mistakes Should You Avoid When Installing a Toilet?
Mistake 1: Improperly Securing the Toilet
One common mistake during installation is not securing the toilet properly. If the toilet is not level or the bolts aren’t tightened evenly, it can cause the toilet to wobble or leak. Always ensure that the toilet is sitting flush against the floor before securing it, and tighten the bolts gradually and evenly. Using a level during installation can help prevent this mistake.
Mistake 2: Over-Tightening Bolts
Another frequent error is over-tightening the bolts that secure the toilet to the floor. While it’s important that the toilet is secure, applying too much pressure can crack the porcelain base, leading to costly repairs. The key is to tighten the bolts just enough to keep the toilet stable without forcing them. If the toilet is still unsteady after tightening, consider using shims to level it rather than applying more pressure.
Mistake 3: Not Checking for Leaks
After installing the toilet, it’s crucial to check for leaks. Failing to do so can result in water damage to your bathroom floor over time. After the installation is complete and the water supply is turned back on, inspect the base of the toilet and the connections for any signs of water leakage. If you notice any leaks, tighten the connections or reposition the wax ring as needed to ensure a proper seal.
Conclusion
Learning how to install a new toilet without a plumber can be a highly rewarding experience. By following these steps, you’ll not only save money but also gain the satisfaction of completing a home improvement project on your own. From preparing the flange and wax ring to carefully positioning and securing the toilet, each step is crucial to ensuring a successful installation. Avoid common mistakes like improperly securing the toilet, over-tightening bolts, and not checking for leaks. With this guide, you’re now equipped to confidently install your new toilet and enjoy the results of your hard work.
FAQs:
1.How long does it take to install a new toilet?
The installation process for a new toilet typically takes about 2 to 3 hours. This timeframe can vary depending on your experience and the condition of the existing plumbing.
2.Can I reuse the old wax ring when installing a new toilet?
It’s not recommended to reuse the old wax ring when installing a new toilet. A new wax ring ensures a proper seal and helps prevent leaks.
3.What should I do if my toilet leaks after installation?
If your toilet leaks after installation, first check the connections and the wax ring. Tighten any loose bolts and ensure the wax ring is properly seated. If the leak persists, you may need to replace the wax ring.
