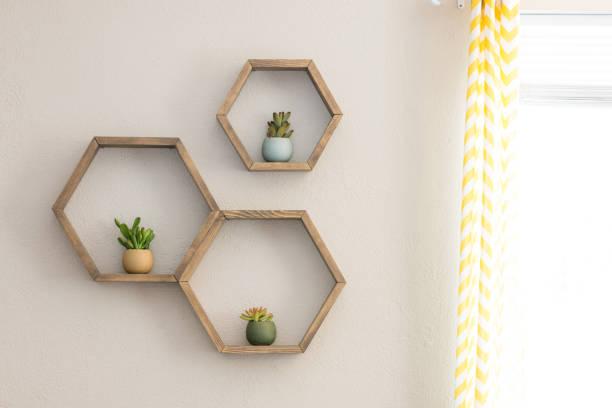
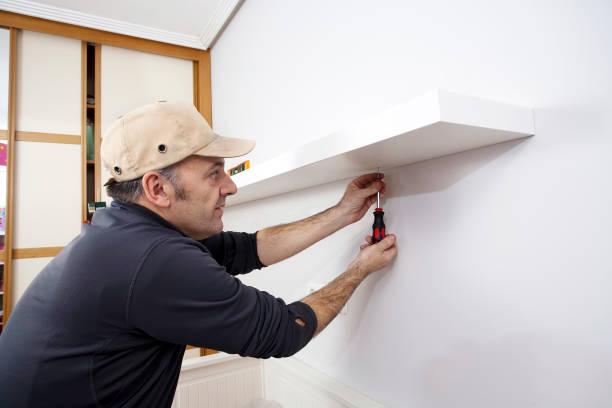
Ever noticed how a simple floating shelf can turn a blank wall into a stylish focal point? Installing floating shelves not only adds storage space but also infuses character into your home. Surprisingly, nearly 80% of homeowners who installed floating shelves reported that they significantly improved the room’s aesthetics. In this guide, we’ll walk you through how to install floating shelves, offering practical tips and creative ideas to make sure your shelves are both sturdy and stunning.

How to Install Floating Shelves
Installing floating shelves might seem daunting at first glance, but with the right approach and tools, it’s a straightforward project that you can tackle with confidence. Let’s break down the process.
What Tools and Materials Do You Need?
Before we get started, let’s gather everything you’ll need. Being prepared with the right tools and materials will save you time and help ensure your project is a success.
Floating shelf kit: Includes the shelf and mounting brackets.
Drill and drill bits: To make precise holes for the screws.
Screws: Usually provided with the shelf kit, but have extras on hand.
Level: Ensures your shelf is perfectly horizontal.
Tape measure: For accurate measurements.
Stud finder: Helps locate studs behind the drywall.
Pencil: For marking where to drill.
Anchors: Use drywall anchors if you can’t hit a stud.
Screwdriver: To tighten screws securely.
Having these tools ready will ensure you don’t have to pause mid-project to hunt for a missing item.
Step-by-Step Instructions
Now that you’ve gathered your tools and materials, let’s walk through the steps to install your floating shelves.
1.Choose Your Location
Decide where you want to install the shelves. Consider both functionality and aesthetics. Are you using the shelves for storage or as a display? How will they complement the room’s design? Once you’ve chosen the spot, hold the shelf against the wall to visualize its placement. Use a pencil to lightly mark the top edge on the wall.
2.Locate the Wall Studs
Use a stud finder to locate the studs in the wall. Studs provide the best support for your shelves, especially if you plan to place heavy items on them. Mark the stud locations with a pencil. If you can’t find a stud where you want to place the shelf, don’t worry—you can use drywall anchors as an alternative.
3.Mark the Mounting Holes
Hold the shelf bracket against the wall where you marked the top edge of the shelf. Ensure it’s level by placing a level on top of the bracket. Mark the screw holes on the wall with your pencil.

4.Drill the Pilot Holes
Using the appropriate drill bit, drill pilot holes where you marked the screw locations. If you’re drilling into a stud, use a bit that’s slightly smaller than the screw diameter. If you’re using drywall anchors, drill holes large enough to fit the anchors.
5.Install the Bracket
Align the bracket with the pilot holes and insert the screws. Use a screwdriver or a drill to secure the bracket to the wall. If you’re using drywall anchors, insert them into the holes before attaching the bracket. Ensure the bracket is firmly attached to the wall—it will bear the weight of the shelf and anything you place on it.
6.Mount the Shelf
Slide the floating shelf onto the bracket. Most floating shelves have a hollow back that fits snugly over the bracket. Push the shelf flush against the wall and ensure it’s level. Some shelves have small screws or clips that secure the shelf to the bracket; if yours does, be sure to tighten them.
7.Check Stability
Give the shelf a gentle tug to ensure it’s securely mounted. The shelf should feel solid and not wobble. If it feels loose, double-check the bracket screws and ensure they’re tight. Adjust if necessary.
8.Final Touches
After the shelf is mounted, take a moment to ensure everything is straight and secure. If there are any visible gaps or imperfections, use wood filler or putty to touch up the areas around the brackets. Allow any touch-up work to dry, then sand lightly and repaint if necessary.
Congratulations! You’ve successfully installed your floating shelves. Now, let’s talk about how to make them look their best.
Tips for Styling and Decorating Your Floating Shelves
Once your floating shelves are installed, the next step is to decide what to display on them. The beauty of floating shelves lies in their versatility. You can use them to showcase your personality and create a visually pleasing arrangement that complements your space. Here are some tips to help you style your shelves like a pro:
Balance Practicality with Aesthetics
While it’s tempting to fill your shelves with pretty items, don’t forget their practical purpose. A good rule of thumb is to balance 70% decorative objects with 30% functional items. For instance, combine books with small sculptures, framed photos, or plants.
Vary Heights and Shapes
To create visual interest, vary the height and shape of the objects on your shelves. Stack books horizontally and vertically, place a tall vase next to a shorter candle holder, or layer framed art pieces. This variation keeps the eye moving across the shelf and prevents a cluttered look.
Create a Color Scheme
Stick to a color scheme that complements the room. Whether it’s monochrome, neutrals, or pops of color, a consistent palette will make your shelves look cohesive. Use different shades and textures within that scheme to add depth and interest.
Use the Rule of Thirds
The rule of thirds is a design principle that can help you arrange items in a more appealing way. Divide your shelf into three sections and arrange items in odd numbers—threes, fives, or sevens. This creates a balanced yet dynamic display.
Incorporate Greenery
Plants bring life to any space. Whether it’s a cascading pothos, a small succulent, or a bunch of fresh flowers, greenery softens the look of your shelves and adds a natural element.
Add Personal Touches
Don’t be afraid to include personal items on your shelves. Family photos, travel souvenirs, or pieces that have sentimental value can make your display feel unique and personalized.
Keep It Minimal
Sometimes less is more. If you prefer a minimalist look, don’t overcrowd your shelves. A few well-chosen items can make a stronger statement than a cluttered collection.
With these tips, your floating shelves will not only be functional but also a stunning feature in your home that reflects your personal style.
Conclusion
Now that you know how to install floating shelves, you can transform any room with stylish, functional storage that fits seamlessly into your home’s design. Whether you’re displaying cherished mementos, organizing books, or adding a pop of greenery, floating shelves are an easy and impactful way to elevate your space.
Ready to start your shelving project? Gather your tools, pick the perfect spot, and let your creativity shine. With a little effort, you’ll have beautiful floating shelves that not only serve a practical purpose but also make a striking design statement.
FAQs
Can floating shelves hold heavy items?
Yes, floating shelves can hold heavy items if installed correctly. Make sure to anchor the shelves into wall studs or use appropriate drywall anchors. Always check the weight limit of the shelf and ensure it’s mounted securely.
How do I ensure my floating shelves are level?
Use a level during installation. Place it on top of the shelf bracket before drilling your pilot holes. Double-check the level once the shelf is mounted to make any necessary adjustments.
What if I can’t find wall studs where I want to hang my shelves?
If you can’t find wall studs, use heavy-duty drywall anchors. These provide the necessary support for your shelves and can hold a significant amount of weight without the need for a stud.
