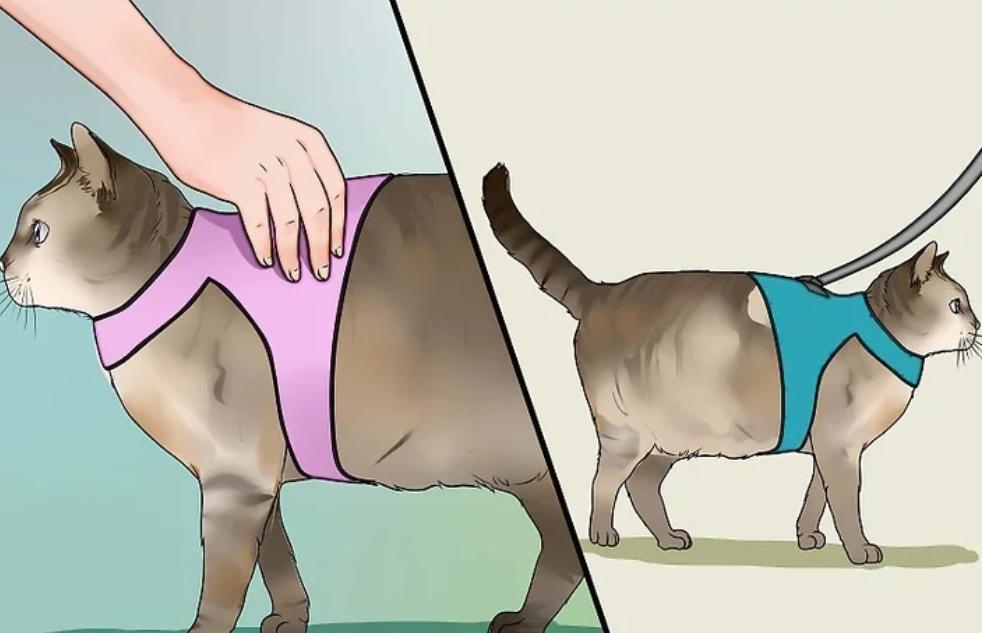
Making your own cat harness at home is a practical and creative way to ensure your feline friend’s comfort and safety. A DIY harness allows you to choose the best materials for your cat’s specific needs, ensuring that it’s not only comfortable but also secure. While store-bought harnesses may not always fit your cat perfectly, a homemade harness lets you customize the design for a perfect fit. In this guide, you’ll learn how to make a cat harness that’s functional, stylish, and budget-friendly.
Materials and Tools You Need to Make a Cat Harness
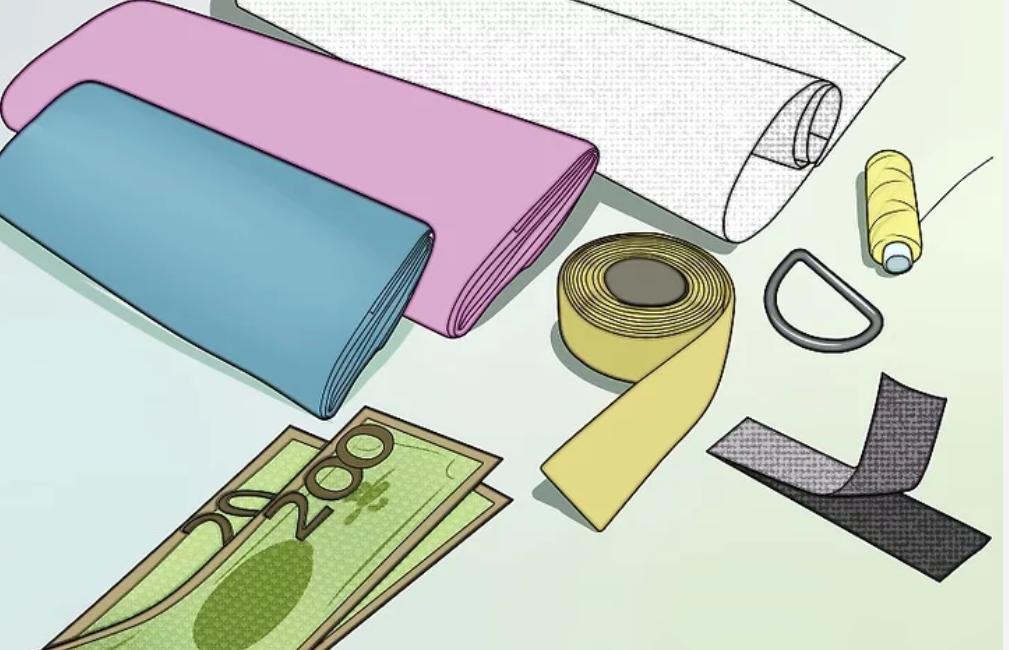
Before diving into the project, it’s important to gather the right materials and tools to ensure the harness is both durable and comfortable for your cat. Here’s a breakdown of what you’ll need to get started.
The fabric you choose greatly affects your cat’s comfort. Soft, breathable options like cotton or nylon are best. Cotton is gentle for indoor cats, while nylon is durable for outdoor use. Avoid rough materials like canvas, which can irritate the skin. Mesh is a good option for extra ventilation, especially in warmer climates. Ensure the fabric is washable, as harnesses will get dirty.
To make a cat harness, you’ll need some basic sewing tools. Here’s a list of what you’ll need:
By gathering all your materials and tools ahead of time, you’ll save yourself from interruptions once you start the project.

How to Measure Your Cat for a Harness
One of the most common mistakes when measuring a cat for a harness is not accounting for movement. Cats are agile creatures, so the harness needs to be snug but not restrictive. Measuring while your cat is lying down or sitting can lead to inaccuracies, so make sure they are standing naturally. Another mistake is not leaving enough room for adjustments—always aim to add a little extra space for comfort. Additionally, avoid measuring too tightly. It’s tempting to get a snug fit, but a too-tight harness can restrict your cat’s breathing or movement. On the other hand, a too-loose harness increases the risk of your cat slipping out of it.
To get the best fit, you’ll need to take two key measurements: around the chest (just behind the front legs) and around the neck. When measuring, leave about two fingers of space between the measuring tape and your cat’s body to ensure comfort and ease of movement. After you’ve made the harness, it’s important to test it on your cat to ensure it’s neither too tight nor too loose. Also, keep in mind that some cats may react poorly to a new harness at first, even if it fits well. Introduce it slowly and monitor how your cat responds to wearing it.
Step-by-Step Guide to Making a Cat Harness at Home
Now that you have your materials and measurements ready, it’s time to start crafting the harness. Follow these steps to create a durable and comfortable harness for your cat.
Step 1: Cut and Prepare the Fabric
Start by cutting the fabric based on your measurements. You’ll need two long straps—one for the neck and one for the chest. If you want extra durability, you can fold the fabric over and sew along the edges to create double-layered straps. This will make the harness more secure and longer-lasting. Use pins to keep the fabric in place as you work, and make sure your cuts are straight to avoid uneven straps.
Step 2: Sew the Straps and Attach the D-ring
Next, sew the edges of the straps to prevent them from fraying. Once the straps are ready, it’s time to attach the D-ring. Sew the neck and chest straps together at the point where they will sit on your cat’s back, and securely attach the D-ring at this junction. Make sure to use extra stitches here, as the D-ring will need to withstand pulling when your cat is on a leash.
Step 3: Create Adjustable Closures Using Velcro or Buckles
For the closures, Velcro and buckles both work well. Velcro is easy to use and allows for quick adjustments, while buckles offer a more secure fit. Whichever option you choose, sew the closures onto the ends of the neck and chest straps. Ensure that the closures are placed in such a way that they can be easily adjusted, allowing you to tighten or loosen the harness as needed.
Step 4: Assemble the Harness and Test for Size and Comfort
Once you’ve sewn the straps and added the closures, it’s time to assemble the harness. Put the harness on your cat and check for fit. If it’s too tight or too loose, make adjustments by moving the closures or trimming the straps. Be sure that your cat can move comfortably and that the harness doesn’t rub against their skin in a way that could cause irritation. Pay attention to how your cat reacts—if they seem uncomfortable, try loosening the straps slightly.
Step 5: Adding Personalization (optional, e.g., decorations, reflective elements)
If you want to make the harness unique, consider adding decorative touches. You can sew on fabric patches, use fabric paint to create designs, or even add reflective strips for visibility during nighttime walks. Just make sure any decorations you add don’t interfere with the harness’s functionality or comfort.
Sewing and Training Tips for a Homemade Cat Harness
Creating a homemade cat harness can be a rewarding project, but it requires careful attention to detail, both in crafting and introducing your cat to the new gear. Below are helpful tips to ensure your sewing process is smooth and your cat’s training is stress-free.
Sewing Tips for Beginners
If you’re new to sewing, take your time and don’t rush. Practice on scrap fabric before starting on the harness to ensure your stitches are even and secure. When sewing the D-ring and closures, reinforce these areas with extra stitches, as these are the parts that will experience the most stress. If you’re using a sewing machine, opt for straight stitches for durability.
How to Train Your Cat to Wear a Homemade Harness
Once your harness is complete, the next step is getting your cat used to wearing it. Start by placing the harness near your cat’s favorite spot and let them sniff it. When they seem comfortable, gently place the harness on without fastening it. Gradually increase the time they wear it, rewarding them with treats for positive reinforcement. Training may take days or weeks, depending on your cat’s personality, so be patient. Never force your cat to wear the harness if they seem distressed.

Conclusion
Creating a homemade cat harness is a fun and practical DIY project that lets you customize the fit and style to your pet’s needs. If you’ve ever wondered how to make a cat harness, it’s easier than you might think. With the right materials, careful measurements, and a little sewing know-how, you can make a harness that’s comfortable and secure for your cat. Follow the steps in this guide, and you’ll have a harness that fits your cat perfectly, ensuring both comfort and safety on your next adventure together
FAQ
Is it safe to make a cat harness at home?
Yes, it’s safe as long as you use high-quality materials and ensure the harness fits properly. Make sure the harness is durable and doesn’t have any sharp edges or uncomfortable seams that could hurt your cat.
Can I use different materials like leather or paracord for the harness?
While materials like leather or paracord can be used, they may not offer the same level of comfort as softer fabrics like cotton or nylon. If you opt for these materials, make sure to line them with something soft and ensure they are flexible enough for your cat to move freely.
How do I know if the harness fits my cat properly?
The harness should fit snugly, with enough room to fit two fingers between the straps and your cat’s body. Check for signs of discomfort, such as your cat trying to wiggle out of the harness or any rubbing around the neck or chest. If needed, adjust the closures for a more comfortable fit.
