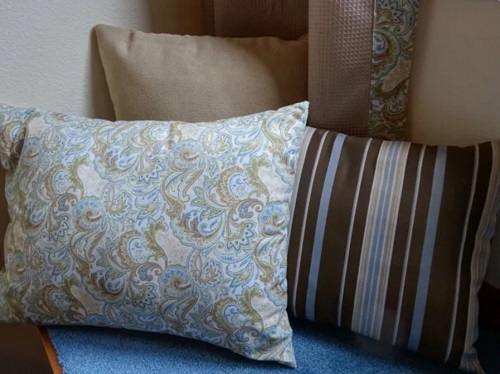
Creating a pillow cover is an excellent project for beginners. It’s a simple way to personalize your home decor while learning basic sewing skills. In this guide, we’ll walk you through every step of how to make a pillow cover, from gathering materials to the final stitches. Whether you’re aiming for a quick refresh of your living space or a unique handmade gift, this tutorial will help you get started. By the end, you’ll have a beautiful pillow cover that reflects your style and newfound sewing abilities.

What Materials Do You Need to Make a Pillow Cover?
To make a pillow cover, you’ll need several key materials. First, choose your fabric. Cotton is an ideal choice for beginners due to its ease of handling. You’ll also need a sewing machine, though hand stitching is an option if you prefer. Other essentials include a ruler or measuring tape, scissors, pins, and either a zipper, buttons, or fabric for an envelope closure. Having all your materials ready before you begin will make the process smoother and more enjoyable. These materials will be the foundation of your project, ensuring that your first attempt at how to make a pillow cover is successful and stress-free.
How to Measure and Cut Fabric for Your Pillow Cover?
Accurate measurement and cutting are crucial for a professional-looking pillow cover. Start by measuring the pillow insert you plan to cover. Add one inch to each measurement for seam allowance—this extra fabric ensures your pillow cover fits well. Lay your fabric on a flat surface and mark the dimensions carefully using a fabric marker or chalk. When cutting, ensure your lines are straight to avoid uneven edges. Precise cutting is key in how to make a pillow cover that not only fits perfectly but also looks polished.
Step-by-Step Guide: How to Sew a Pillow Cover
Setting Up Your Sewing Machine
Before you start sewing, it’s important to set up your sewing machine correctly. Thread the machine, wind the bobbin, and choose a straight stitch setting. If you’re new to sewing, spend some time practicing on scrap fabric to get comfortable with the machine’s speed and control. Proper setup is essential for smooth sewing and will prevent common beginner mistakes like thread bunching or uneven stitching. By mastering your machine setup, you’ll be better equipped to create a flawless pillow cover.
Sewing the Seams and Finishing Edges
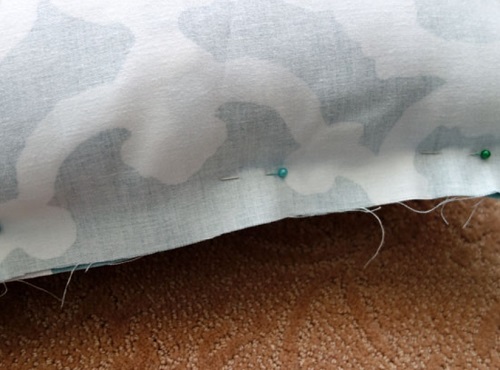
With your fabric pieces cut and pinned together, you’re ready to start sewing. Place the fabric with the right sides facing each other and pin around the edges. Sew along three sides, leaving one side open for inserting the pillow. Use a straight stitch and keep your seam allowance consistent for a neat finish. Once sewn, trim any excess fabric and finish the raw edges with a zigzag stitch or serger to prevent fraying. This step in how to make a pillow cover is crucial for ensuring durability and a professional appearance.

Adding Closures: Zippers vs. Envelope Style
Choosing the right closure method is an important decision in your pillow cover project. Zippers offer a sleek and secure finish, though they require a bit more skill to install. Alternatively, an envelope-style closure, where the fabric overlaps at the back, is easier and doesn’t require additional hardware. Both methods have their advantages, so choose based on your comfort level and the look you’re aiming for. Learning these techniques expands your knowledge of how to make a pillow cover, giving you options for future projects.
How to Personalize Your Pillow Cover?
Adding Decorative Elements
Personalizing your pillow cover with decorative elements is where you can really let your creativity shine. Consider adding piping around the edges for a tailored look, or appliqué for a fun, customized design. You could also use fabric paint or embroidery to add patterns or monograms. These small details can turn a simple pillow cover into a statement piece that complements your decor. This part of how to make a pillow cover is about making it your own and ensuring it reflects your personal style.
Creative Ideas for Unique Pillow Covers
When it comes to pillow covers, the possibilities are endless. Consider using bold, contrasting fabrics, or mix and match different textures to create a unique look. Repurposing old clothes or linens is another way to make an environmentally friendly pillow cover that’s full of character. You could even create seasonal covers to change up your decor throughout the year. By exploring creative ideas, you’ll discover how to make a pillow cover that stands out and adds a personal touch to your living space.
Conclusion
Making your own pillow cover is a rewarding project that combines creativity with practical skills. You’ve learned how to make a pillow cover from selecting materials to adding final touches like closures and decorative elements. With these steps, you can create custom pillow covers that enhance your home decor and showcase your sewing abilities. Whether you’re making one pillow cover or several, the techniques you’ve mastered will serve you well in future DIY projects. Keep experimenting with different fabrics and styles, and soon you’ll be crafting pillow covers like a pro.
FAQ:
1.What is the easiest fabric to work with for a beginner?
Cotton is the easiest fabric to work with for beginners. It’s stable, doesn’t stretch, and is easy to cut and sew, making it perfect for learning how to make a pillow cover.
2.Can I make a pillow cover without a sewing machine?
Yes, you can make a pillow cover without a sewing machine. Hand stitching is a viable option, especially for simple designs or if you prefer a more hands-on approach.
3.How do I wash my DIY pillow cover to maintain its quality?
Wash your DIY pillow cover in cold water on a gentle cycle. Avoid using harsh detergents and opt for air drying to preserve the fabric and keep your pillow cover looking new.
