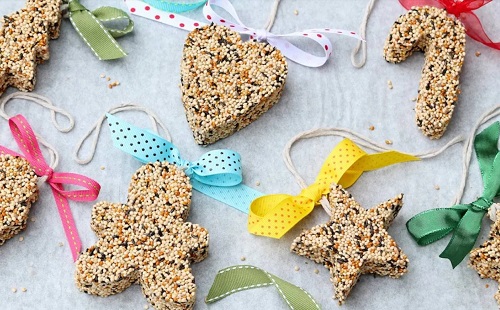
Bird food ornaments are a delightful way to attract birds to your garden while adding a touch of creativity to your outdoor space. Making these ornaments at home is easy, fun, and eco-friendly. Whether you’re an avid birdwatcher or just looking to try a new DIY project, learning how to make bird food ornaments can be a rewarding experience. This guide will walk you through the process, providing tips and ideas to ensure your bird food ornaments are a success. By the end, you’ll have a beautiful garden filled with happy, well-fed birds, all thanks to your handmade creations.

What Materials Do You Need for Bird Food Ornaments?
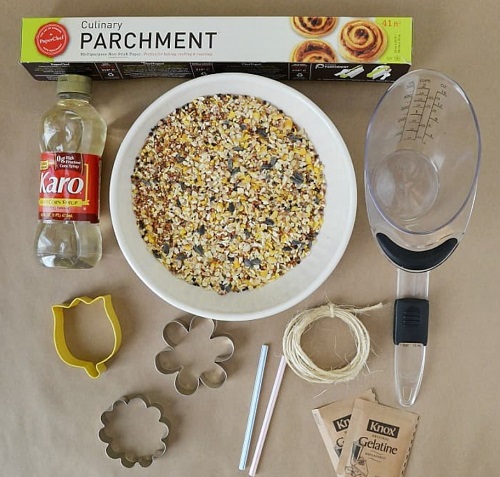
To start making bird food ornaments, gather the essential materials. You’ll need birdseed, gelatin or peanut butter as a binder, cookie cutters or molds, parchment paper, and a few simple tools like a spoon and mixing bowl. Choose birdseed that’s suitable for the birds in your area, such as sunflower seeds or millet. If you prefer an alternative binder, peanut butter is an excellent option, especially for suet-based ornaments. Don’t forget the twine or string for hanging your ornaments. With these materials in hand, you’re ready to begin crafting.

Step-by-Step Guide to Creating Bird Food Ornaments
Step 1: Mix Your Ingredients
Start by preparing your binder. If using gelatin, dissolve it in warm water according to the package instructions. For peanut butter-based ornaments, simply mix the peanut butter with a bit of flour to thicken it. Next, combine the birdseed with your chosen binder in a large bowl, ensuring the seeds are evenly coated. This mixture is the foundation of your bird food ornaments, and getting the consistency right is key to their success.
Step 2: Mold Your Ornaments
Once your mixture is ready, it’s time to shape your ornaments. Lay out your parchment paper and place the cookie cutters or molds on top. Spoon the birdseed mixture into each mold, pressing it firmly to ensure it holds its shape. If you’re feeling creative, experiment with different shapes and sizes. As you work, insert a small piece of twine into each ornament for hanging. Allow the ornaments to set in the fridge for a few hours or until they’re firm.
Step 3: Dry and Decorate
After the ornaments have set, carefully remove them from the molds and place them on a drying rack. Let them air dry for 24-48 hours to ensure they’re fully hardened. Once dry, you can decorate your bird food ornaments with additional seeds or small berries for an extra touch. These decorative elements not only add visual appeal but also provide additional food sources for the birds. Your ornaments are now ready to hang and enjoy!
Tips for Shaping and Molding Your Ornaments
Shaping and molding your bird food ornaments can be both fun and challenging. To ensure success, use cookie cutters or silicone molds for consistent shapes. Press the mixture firmly into the molds to avoid crumbling. If you’re using natural molds like pine cones, coat them with peanut butter before rolling them in birdseed. For added durability, especially in colder climates, consider adding a bit more binder to your mixture. Remember to chill the ornaments thoroughly before removing them from the molds to prevent breaking.
How to Hang Bird Food Ornaments in Your Garden
Hanging your bird food ornaments is as simple as finding the right spot in your garden. Choose sturdy branches where birds frequently visit. Use biodegradable twine to minimize environmental impact. To attract a variety of birds, hang the ornaments at different heights. If you’re concerned about squirrels or other critters, consider placing the ornaments in a squirrel-proof feeder or use a baffle. Regularly check the ornaments to ensure they’re holding up and replace them as needed to keep your garden birds well-fed.
What Are the Benefits of Making Bird Food Ornaments?
Making bird food ornaments offers several benefits. It’s an enjoyable craft activity that can be done with family and friends, making it perfect for all ages. These ornaments provide a valuable food source for birds, especially during the winter months when natural food can be scarce. Additionally, creating bird food ornaments fosters a deeper connection with nature and enhances your garden’s biodiversity. Not to mention, the sight of birds enjoying your handmade creations is incredibly rewarding. Plus, using eco-friendly materials ensures that your efforts have a positive impact on the environment.
Conclusion
Now that you’ve learned how to make bird food ornaments, you’re ready to add a charming and functional touch to your garden. This DIY project is not only simple but also provides significant benefits for local wildlife. By following the steps and tips outlined in this guide, you’ll be able to create beautiful, durable ornaments that birds will love. Whether you’re looking to attract more birds to your yard or simply enjoy a fun, eco-friendly craft, bird food ornaments are a wonderful way to achieve both. So, gather your materials, get creative, and enjoy the beauty and satisfaction of making your own bird food ornaments.
FAQ:
1.How long do bird food ornaments last?
Bird food ornaments typically last 1-2 weeks, depending on weather conditions and how quickly the birds consume them. If they’re exposed to rain or humidity, they may soften and break apart sooner.
2.Can I use different seeds for bird food ornaments?
Yes, you can customize your bird food ornaments with various seeds. Sunflower seeds, millet, and cracked corn are popular choices. You can also add dried fruits or nuts for added variety.
3. What should I avoid when making bird food ornaments?
Avoid using salt, sugar, or any ingredients that could harm birds. Also, steer clear of using bread, as it provides little nutritional value and can spoil quickly. Stick to natural, bird-safe ingredients to ensure their safety.
