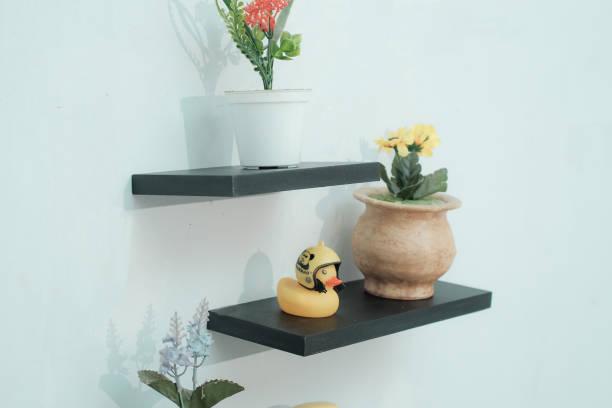
Ever wondered how to make floating shelves that add both style and function to your home? It’s easier than you think! Floating shelves are not only a sleek way to display your favorite items, but they also save space and eliminate the need for bulky furniture. Whether you’re a seasoned DIY enthusiast or a beginner looking for a weekend project, creating floating shelves is a fulfilling task that can transform any room in your home.

How to Make Floating Shelves
Crafting your own floating shelves is an excellent way to add a personal touch to your living space. With a few tools, some basic materials, and a little elbow grease, you’ll have custom shelves that look like they were installed by a professional. Let’s break down the process step-by-step so you can confidently create your own.
Tools and Materials Needed
Before we get started, let’s gather everything we need. Having the right tools and materials at your disposal is half the battle won. Here’s what you’ll need:
|
Tools: |
Materials: |
|
Measuring tape |
Wooden boards (the type of wood depends on your preference, but pine, oak, or walnut are popular choices) |
|
Level |
Brackets (hidden floating shelf brackets are recommended) |
|
Drill with various drill bits |
Screws (appropriate for your wall type) |
|
Stud finder |
Wood stain or paint (optional, for finishing) |
|
Miter saw or circular saw |
Wood filler |
|
Sandpaper (various grits) |
Anchors (for drywall installation) |
|
Screwdriver |
|
|
Safety goggles and gloves |
Step-by-step Guide
Now that we have our tools and materials ready, let’s roll up our sleeves and get started on making those floating shelves.
1: Planning Your Floating Shelves
The first step in this process is planning. Measure the wall space where you intend to install your shelves. Consider the length, depth, and height of the shelves to ensure they fit well in the intended space. It’s crucial to decide on the purpose of the shelves—whether they’ll hold books, décor, or kitchen essentials—as this will dictate the thickness of the wood and the type of brackets you’ll need.
Next, sketch out your design. Visualize how the shelves will look and function. Are they purely decorative, or will they need to hold heavy items? This will help you determine the right materials and bracket strength. Keep in mind that balance is key; shelves that are too long or too deep can overpower a space, while too small and they might look lost.
2: Cutting and Preparing the Shelves
Once you’ve got your plan in place, it’s time to cut your wood to size. If you’re using a miter saw or circular saw, measure twice and cut once—accuracy is everything here. After cutting, sand the edges and surfaces of the wood to smooth out any rough spots. Start with a coarse-grit sandpaper and work your way to a finer grit for a polished finish.
At this stage, you can also apply wood stain or paint, depending on your desired look. If you’re staining, make sure to do it in a well-ventilated area and allow ample drying time between coats. Remember, multiple thin coats of stain are better than one thick coat. If you’re painting, consider using a primer first to ensure an even finish.
3: Installing the Brackets
With your shelves prepped and ready, it’s time to install the brackets. Use a stud finder to locate the studs in your wall. Attaching the brackets to studs is ideal because it provides the most support. If you’re unable to mount into studs, use wall anchors to ensure your shelves are secure.
Mark the points where you’ll be drilling and ensure they’re level. This is crucial—nobody wants a wonky shelf! Drill pilot holes for the screws to avoid splitting the wood or damaging the drywall. Then, attach the brackets securely to the wall. Double-check that everything is level before tightening the screws completely.

4: Mounting the Shelves
Now comes the satisfying part—mounting your shelves. Simply slide the wooden boards onto the brackets. Depending on the bracket design, you may need to secure the shelves to the brackets with additional screws. Ensure the shelves are snug and level.
If you’ve opted for floating shelf brackets that are hidden, your shelves should appear to be “floating” against the wall with no visible means of support. This clean look is what makes floating shelves so popular in modern and minimalist designs.
5: Finishing Touches
Finally, let’s add the finishing touches to make your shelves not only functional but also beautiful. Use wood filler to cover any screw holes or imperfections in the wood. Once the filler dries, sand it smooth and apply a final coat of stain or paint if needed.
Step back and admire your handiwork. Arrange your items on the shelves—balance heavier objects on the ends and lighter ones in the center to maintain stability. Consider the aesthetic arrangement of your décor; a mix of books, plants, and decorative items can create an eye-catching display.
Common Mistakes to Avoid
Even the most meticulous DIYers can make mistakes. Here are some common pitfalls to avoid when making floating shelves:
1.Ignoring Wall Type: Different wall materials require different anchors. Ensure you’re using the correct type for your wall to avoid shelves pulling away or falling down.
2.Inaccurate Measurements: Always double-check your measurements before cutting or drilling. A small mistake in measurement can lead to misaligned shelves or gaps that are hard to correct later.
3.Overloading the Shelves: Even the sturdiest shelves have a weight limit. Avoid overloading them, especially if they’re attached to drywall without proper support.
4. Skipping the Stud Finder: Mounting brackets into drywall without hitting a stud or using proper anchors can result in shelves that sag or fall.
5. Uneven Shelves: Not using a level when installing brackets is a common mistake. Uneven shelves are not only unsightly but also unstable.
Conclusion
Learning how to make floating shelves is a rewarding project that combines functionality with style. Whether you need extra storage space or want to showcase your favorite items, floating shelves are a versatile solution that can enhance any room in your home. By following these steps and avoiding common mistakes, you can confidently create and install shelves that look professionally done.
FAQs
How much weight can floating shelves hold?
Floating shelves can typically hold between 30 to 75 pounds, depending on the materials used and how they are installed. Attaching them to wall studs provides maximum support, allowing for heavier loads.
Do I need to attach floating shelves to studs?
While attaching floating shelves to studs is ideal for maximum support, you can use strong wall anchors if studs aren’t available. However, attaching to studs is always the safest option, especially for heavier loads.
What type of wood is best for floating shelves?
The best wood for floating shelves depends on your preference and budget. Hardwoods like oak, walnut, and maple are durable and aesthetically pleasing, while pine is more affordable and easier to work with.
Can floating shelves be installed on drywall?
Yes, floating shelves can be installed on drywall. However, it’s important to use the correct wall anchors and ensure that the shelves are not overloaded. For heavier items, securing the shelves to studs is recommended.
