Wiring a chandelier to an existing circuit might seem like a challenging task, but with the right guidance, it’s entirely manageable. Whether you’re replacing an old light fixture or installing a chandelier for the first time, knowing how to wire a chandelier safely is crucial. This guide will walk you through each step, ensuring you complete the installation securely and efficiently. By the end, you’ll have a well-lit space with a chandelier that’s properly installed and connected to your home’s electrical system.

What Tools and Materials Do You Need?
Before you start wiring your chandelier, gather all the necessary tools and materials. You’ll need a voltage tester, wire stripper, screwdriver, ladder, and wire nuts. It’s also essential to have the chandelier, mounting bracket, and any additional hardware included with the fixture. Having all these tools at hand ensures you don’t need to pause your work midway, allowing for a smooth installation process. If any of these items are unfamiliar, take the time to familiarize yourself with their functions to avoid mistakes later on.
How to Turn Off the Power and Test the Circuit?
Safely Shutting Off the Circuit Breaker
The first and most critical step in wiring a chandelier is to turn off the power. Locate your home’s main circuit breaker panel and identify the breaker controlling the existing circuit where you’ll install the chandelier. Flip the breaker switch to the “off” position to cut the power. This step is non-negotiable; working with live wires is extremely dangerous. Once the breaker is off, label it or inform others in the household to ensure it remains off during the installation.
Testing the Circuit for Safety
Even with the breaker off, it’s crucial to double-check that the circuit is indeed dead before touching any wires. Use a voltage tester to verify there’s no electricity flowing to the existing circuit. Touch the tester to the wires inside the ceiling box where you’ll connect the chandelier. If the tester shows no voltage, you’re safe to proceed. Testing is a simple but vital step that prevents accidents and ensures you’re working in a safe environment.

How to Wire the Chandelier to the Existing Circuit?
Connecting the Wires to the Chandelier
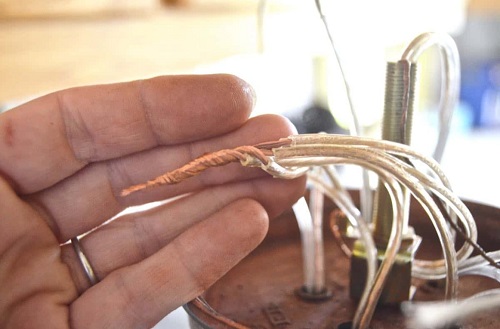
With the power off and the circuit tested, you can start wiring the chandelier. Begin by connecting the chandelier’s wires to the corresponding wires in the ceiling. Typically, the chandelier will have black (hot), white (neutral), and green or bare (ground) wires. Match these to the wires in the ceiling box, twisting the wire ends together and securing them with wire nuts. Make sure the connections are tight to avoid any loose wires that could cause electrical issues later.
Securing the Chandelier to the Ceiling
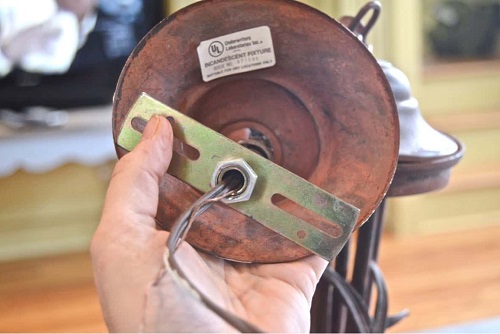
Once the wires are connected, it’s time to secure the chandelier to the ceiling. Attach the chandelier’s mounting bracket to the ceiling box, ensuring it’s firmly in place. Then, carefully lift the chandelier and attach it to the mounting bracket according to the manufacturer’s instructions. It’s essential to ensure the fixture is stable and secure before moving on, as a loose chandelier could fall and cause damage or injury.
Finalizing the Installation and Testing
With the chandelier securely in place, the final step is to test your work. First, restore power to the circuit by flipping the breaker back on. Then, turn on the chandelier using the wall switch. If the chandelier lights up and operates correctly, you’ve successfully wired it to the existing circuit. Take a moment to check that the fixture is stable and that all connections are secure. If everything checks out, your installation is complete.
Common Mistakes to Avoid When Wiring a Chandelier
When wiring a chandelier, there are a few common mistakes to avoid. One of the most frequent errors is not turning off the power completely, which can lead to dangerous electric shocks. Another common mistake is improper wire connections, such as mixing up the hot and neutral wires, which can cause the chandelier to malfunction or even create a fire hazard. Additionally, failing to secure the chandelier properly can result in it becoming loose over time. By paying attention to these details, you can avoid potential problems and ensure a safe and successful installation.
Conclusion
Learning how to wire a chandelier to an existing circuit is a valuable skill that can enhance the look of any room. By following the steps outlined in this guide, you can complete the installation safely and efficiently. Remember to gather all necessary tools, turn off the power, and double-check your work at every step. With careful attention to detail, you’ll enjoy the beauty and functionality of your new chandelier for years to come.
FAQ:
1. What should I do if my chandelier has more wires than the ceiling box?
If your chandelier has more wires than the ceiling box, consult the manufacturer’s instructions for guidance on connecting the additional wires. Usually, these extra wires are for additional features, such as multiple light settings or a fan. Ensure each wire is properly connected and secured with wire nuts.
2. How can I safely install a heavy chandelier?
For a heavy chandelier, it’s crucial to use a ceiling box rated for the weight of the fixture. You may also need additional support, such as a ceiling brace, to secure the chandelier safely. Follow the manufacturer’s instructions carefully and, if in doubt, consider hiring a professional electrician.
3. Can I wire a chandelier without turning off the power?
No, you should never attempt to wire a chandelier without turning off the power first. Working with live wires is extremely dangerous and can result in electric shock, injury, or even death. Always ensure the power is off before starting any electrical work.
